How To Make Cork Coasters (DIY Sewing Tutorial)
This is a must-have in every household, especially if you love your wood furniture. Whether it's an aperitif, digestive, or just a cup of your morning coffee, it's really important that you have some coasters around the house.
We could think of a better material than Cork, as it's impermeable, durable, and resistant. So just grab your favorite cork fabrics and follow these steps to have your own DIY cork coaster to prevent stains and amaze your guests:
- choose the cork fabric of choice;

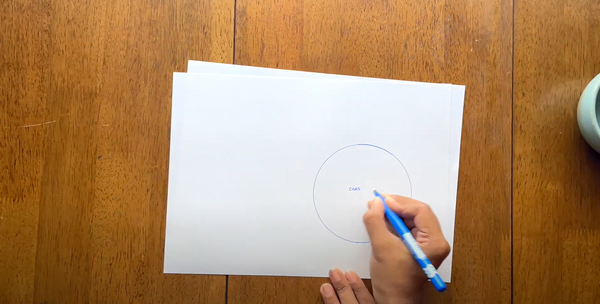
- make the pattern for the coaster (diameter: 4 inches);
- cut 2 pieces for 1 coaster and sandwich the cardboard sheet to make it sturdy;

- glue the pieces together as shown;

- after gluing your pieces should look like this;

- prepare the surface of the fabric with a preparer/ deglazer;

- choose the paint of choice and start painting your designs;

- we are painting some daisies here with just two colors;

- the texture of cork makes it look like it’s raining on these flowers :)

- finish your artwork with an acrylic finisher;

- make an edge stitch around the coaster;

- add a bond solution to the raw edges of the coasters;

- finish it with an edge paint of suitable color;

Your cork coasters are ready :)


Leave a comment